【hexo博客】cactus主题添加亮暗切换功能

cactus 主题添加亮暗切换功能

我搭建博客使用的是 hexo,选择的主题是 cactus 的 dark 模式。然而,虽然原作者提供了多种主题模式供选择(’dark’, ‘light’, ‘classic’ and ‘white’),但并不支持在页面内自由切换,而是在生成博客时就写死。 本着生命在于折腾的本质,我打算给 cactus 手动添加一个切换按钮,适配一下亮暗切换。后续也有打算添加一个根据时间判断,白天使用亮色,夜晚使用暗色。

这次折腾确实有点要命,因为我对前端不是很懂,html js css 之类的也就懂个 1+1=2,其他的就完全一窍不通了。。。以后还是量力而行

我参考了 CSDN: 关于给hexo博客适配全局暗夜深色模式,和 面向小白的Hexo添加暗色模式教程,他们的解决方案是:通过按钮触发,在 body 标签中添加一个 class(例如 .dark),然后在你的 CSS 文件中编写好 .dark 的内容,就能实现暗色。然而我扒拉了一下 cactus 的代码,发现想在 cactus 下实现略有困难。

Cactus 的主题选择

cactus 提供了四种主题(’dark’, ‘light’, ‘classic’ and ‘white’),在 cactus/source/css/_colors 存放了这四种配色的配置文件。以 dark.styl 为例,配置文件内容如下:

1
2
3
4
5
6
7
8
9
10
11
12
13
14
$color-background = #1d1f21
$color-footer-mobile-1 = lighten($color-background, 2%)
$color-footer-mobile-2 = lighten($color-background, 10%)
$color-background-code = lighten($color-background, 2%)
$color-border = #908d8d
$color-meta = #908d8d
$color-meta-code = #908d8d
$color-link = rgba(212, 128, 170, 1)
$color-text = #c9cacc
$color-accent-3 = #cccccc
$color-accent-2 = #eeeeee
$color-accent-1 = #2bbc8a
$color-quote = #ccffb6
$highlight = hexo-config("highlight") || "rainbow"

可以看到,这里保存的是各种变量,包括背景颜色,字体颜色,高亮颜色等等。接下来 cactus/source/css/style.styl 引用了这个 dark.styl 的内容:

1
2
3
4
5
6
7
8
9
10
11
12
@import "_variables"					// 获取 _config.yml 设置的颜色
@import "_colors/" + $colors // 引用 _colors/ 下的主题

... ...

body
margin: 0
height: 100%
background-color: $color-background // 使用主题设置中的颜色
color: $color-text // 同上

... ...

我简单搜索了一下,.styl 是 stylus 的文件,stylus 是一个 CSS 的预处理器。简单来说,就是你编写一个 .styl ,就能帮你根据这个 .styl 编译生成一个 .css 文件。我没找到编译这个 .css 的步骤是在 hexo generate 的哪一步生成的,但是我在 cactus/layout/_partial/head.ejs 找到了下面这两句,说明确实引用的是 style.css 文件。

1
2
<!-- styles -->
<%- css('css/style') %>

那么我的思路就有了。在生成博客的时候,对两种主题(一亮一暗)都生成对应的 style.css 和 style-dark.css。在点击按钮时,将 HTML 中引用的 style.css 替换为 style-dark.css 即可。

修改 Cactus 以支持亮暗切换

生成暗色主题的 .css 文件

经过踩坑,我发现,放在 cactus/source/css/*.styl 都会被自动编译成 .css。所以我直接在这个目录下编写一个 style-dark.styl,其他地方都保持一致,只在引入主题时直接引入 dark 模式:

1
2
@import "_variables"
@import "_colors/dark" // old: "_colors"+$colors

这样就能生成 style-dark.css 了。

插入一个切换按钮

总得给个按钮切换吧。但是由于本人水平太次,也不知道怎么设计一个按钮,放在哪比较合适,所以就对主页图标动了心思。没错就是下面这个仙人掌。本来它的功能是,点击仙人掌跳转到主页。但是这个仙人掌本来就只出现在主页啊。。所以我要把它改成,点击后切换亮暗模式。
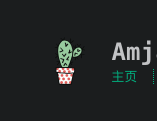
image-20210719115758772

这个仙人掌的代码在:cactus/layout/_partial/header.ejs ,内容如下:

1
2
3
4
5
6
7
8
<header id="header">
<!-- 重点在这个 a 标签里! -->
<a href="<%- url_for("/") %>">

<% if (theme.logo && theme.logo.enabled) { %>
<% if (theme.gravatar && (theme.gravatar.email || theme.gravatar.hash) && theme.logo.gravatar) { %>

... ...

可以看到,这个 a 标签让图标跳转到了主页。那么修改这个标签:

1
2
<!-- <a href="<%- url_for("/") %>"> -->
<a href="javascript:void(0);" onclick="switchNightMode()">

为这个 a 标签绑定一个 switchNightMode() 函数。我把这个函数的定义放在 switch.js 中。

编写 js 切换函数

我创建了 cactus/source/js/switch.js 文件。需要先在 cactus/layout/_partial/head.ejs 中,引用 style.styl 语句的后面,添加对 switch.js 的引用。

1
2
3
4
5
6
7
8
... ...

<!-- styles -->
<%- css('css/style') %>
<!-- 添加到这里!! -->
<%- js('js/switch') %>

... ...

然后在 switch.js 中编写 switchNightMode() ,参考自CSDN,内容如下:

1
2
3
4
5
6
7
8
9
10
11
12
function switchNightMode() {
if(localStorage.getItem("dark") == "true"){
localStorage.setItem('dark', false);
switchToLight();
return;
}
else {
localStorage.setItem('dark', true);
switchToDark();
return;
}
}

思想是,调用 localStorage.getItem("dark") 来判断当前需要处于什么颜色,用 localStorage.setItem("dark", true/false) 来保存切换到了什么颜色。

前面提到,cactus/layout/_partial/head.ejs 有一句 <%- css('css/style') %> ,所以在生成 HTML 后,<head> 标签里有一句对 style.css 的引用,如下:
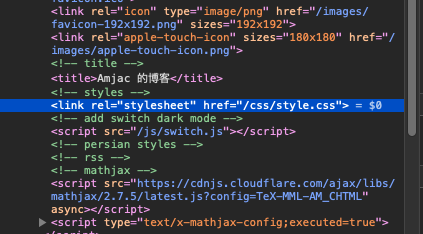
image-20210719114547740

所以,核心思路是,找到 html 中的 <link> 标签,然后找到引用 /css/style.css 的标签,将其引用的链接替换为 /css/style-dark.css 。切换回亮色模式同理。代码如下:

1
2
3
4
5
6
7
8
9
10
11
12
13
14
15
16
17
18
19
20
21
22
23
function switchToDark()
{
var links = document.getElementsByTagName("link");
for (var i = 0; i < links.length; i++) {
// console.log(links[i].href);
if (links[i] && links[i].href && links[i].href.indexOf("/css/style.css") != -1){
// console.log("change.");
links[i].setAttribute("href","/css/style-dark.css");
}
}
}

function switchToLight()
{
var links = document.getElementsByTagName("link");
for (var i = 0; i < links.length; i++) {
// console.log(links[i].href);
if (links[i] && links[i].href && links[i].href.indexOf("/css/style-dark.css") != -1){
// console.log("change.");
links[i].setAttribute("href","/css/style.css");
}
}
}

这个时候,就已经可以实现亮暗切换了。

img

但是问题是,在主页切换了之后,点击文章链接,主题颜色就又复原了。。所以我在 switch.js 中添加了一段代码,每次夹在 switch.js 时,都会检查当前的 localStorage.getItem("dark") ,然后自动进行一次主题颜色的切换。由于 switch.js 是在 <head> 中引入的,所以在页面加载之前就会执行,不会出现闪屏的现象。在 switch.js 末尾添加代码:

1
2
3
4
5
6
7
8
9
10
11
12
(function(){//console.log("dark = ", localStorage.getItem("dark"));
if (localStorage.getItem == "null"){
localStorage.setItem("dark", true);
}
if (localStorage.getItem("dark") == "true"){
// console.log("a");
switchToDark();
} else {
// console.log("b");
switchToLight();
}
})();

此外,这也是 switch.js 的引入必须在 style.css 之后的原因。如果放在前面,那么

调用 switchToDark()document.getElementsByTagName("link") 将找不到引用 style.css 的 link 标签。因为还没插入。亮暗切换功能已经完成。

附:在文章界面添加切换功能

前面只在主页添加了按钮。但是这个按钮在文章界面是没有的。所以我打算给文章界面也添加一个切换按钮。找来找去,觉得这个侧边导航栏不错。原版的四个按钮分别是前一篇/后一篇文章,回到顶部,和分享文章。这个分享功能我不太喜欢(直接复制链接不得了),准备给它改成切换按钮。
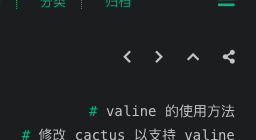
image-20210719123021827

cactus/layout/_partial/post/actions_desktop.ejs 中,这四个按钮对应一个无序列表,如下。

1
2
3
4
5
6
7
8
9
10
11
<span id="actions">
<ul>
<% if (page.prev) { %>
<li><a class="icon" aria-label="<%- __('post.desktop.previous') %> " href="<%- url_for(page.prev.path) %>"><i class="fas fa-chevron-left" aria-hidden="true" onmouseover="$('#i-prev').toggle();" onmouseout="$('#i-prev').toggle();"></i></a></li>
<% } %>
<% if (page.next) { %>
<li><a class="icon" aria-label="<%- __('post.desktop.next') %> " href="<%- url_for(page.next.path) %>"><i class="fas fa-chevron-right" aria-hidden="true" onmouseover="$('#i-next').toggle();" onmouseout="$('#i-next').toggle();"></i></a></li>
<% } %>
<li><a class="icon" aria-label="<%- __('post.desktop.back_to_top') %> " href="#" onclick="$('html, body').animate({ scrollTop: 0 }, 'fast');"><i class="fas fa-chevron-up" aria-hidden="true" onmouseover="$('#i-top').toggle();" onmouseout="$('#i-top').toggle();"></i></a></li>
<li><a class="icon" aria-label="<%- __('post.desktop.share') %> " href="#"><i class="fas fa-share-alt" aria-hidden="true" onmouseover="$('#i-share').toggle();" onmouseout="$('#i-share').toggle();" onclick="$('#share').toggle();return false;"></i></a></li>
</ul>

每个选项的显示图标来自标签 <i class="fas fa-chevron-left"> 。我挑选了一个灯泡图标 class="fas fa-lightbulb"onmouseover=onmouseout= 属性是文字描述。我在 cactus/languages/zh-CN.yml 中添加了对 switch_color_scheme 的两个文字描述:

1
2
3
4
5
6
7
8
9
10
11
12
13
post:
desktop:
previous: 上一篇
next: 下一篇
back_to_top: 返回顶部
share: 分享文章
switch_color_scheme: 切换主题颜色 # new add!
mobile:
menu: 菜单
toc: 目录
back_to_top: 返回顶部
share: 分享
switch_color_scheme: 切换主题 # new add!

然后,在前面的无序列表中添加一个新的结点:

1
<li><a class="icon" aria-label="<%- __('post.desktop.switch_color_scheme') %> " href="#"><i class="fas fa-lightbulb" aria-hidden="true" onmouseover="$('#i-switch').toggle();" onmouseout="$('#i-switch').toggle();" onclick="switchNightMode();return false";></i></a></li>

onclick= 事件后面添加 return false; 可以在点击按钮后,文章的位置不变,否则会跳转到当前页面的最上方。我顺手把 share 按钮给注释了。最后的效果如下:

image-20210719124233077

只能说效果还行叭。